本文将介绍如何使用 CommandLineRunner 和 ApplicationRunner 在 SpringBoot 中进行初始化操作。
一、初始化操作
有时候,我们希望在应用启动时进行一些初始化操作(例如:初始化线程池、提前加载加密证书等)。
这个操作应该在项目启动完成后就进行,并且对于整个应用而言只需要进行一次。
此时便可以使用 CommandLineRunner 和 ApplicationRunner 接口来实现。
二、CommandLineRunner 和 ApplicationRunner
1. run() 方法
CommandLineRunner 和 ApplicationRunner 接口都只有一个 run() 方法。
2. 执行时机
run() 将会在 bean 初始化结束后执行。
3. 区别
CommandLineRunner 和 ApplicationRunner 的区别在于 run() 的参数。
- CommandLineRunner 的
run() 的参数是 SpringBoot 启动类的 String[] args 参数
- ApplicationRunner 的
run() 的参数是 ApplicationArguments 对象,可以用于获取外部的配置参数
4. 执行次序
如果有多个 CommandLineRunner 和 ApplicationRunner 的实现类,可以通过对实现类进行 @Order(次序) 注解来指定执行次序。
三、示例
Application:
1
2
3
4
5
6
7
8
9
10
| @SpringBootApplication
public class SpringBoot27InitApplication {
public static void main(String[] args) {
System.out.println("---- Application start ----");
SpringApplication.run(SpringBoot27InitApplication.class, args);
System.out.println("---- Application end ----");
}
}
|
Runner1:
1
2
3
4
5
6
7
8
9
10
11
12
13
14
15
| @Order(1)
@Component
public class Runner1 implements CommandLineRunner {
@Override
public void run(String... args) throws Exception {
System.out.println("---- 应该第一个执行 ----");
}
}
|
Runner2:
1
2
3
4
5
6
7
8
9
10
11
12
13
14
15
| @Order(2)
@Component
public class Runner2 implements ApplicationRunner {
@Override
public void run(ApplicationArguments args) throws Exception {
System.out.println("---- 应该第二个执行 ----");
}
}
|
Runner3:
1
2
3
4
5
6
7
8
9
10
11
12
13
14
| @Component
public class Runner3 implements CommandLineRunner {
@Override
public void run(String... args) throws Exception {
System.out.println("---- 不关心它什么时候执行 ----");
}
}
|
Controller:
1
2
3
4
5
6
7
8
9
| @RestController
public class myController {
@GetMapping("/hello")
public void hello() {
System.out.println("Hello World");
}
}
|
仅在被访问后才会启动
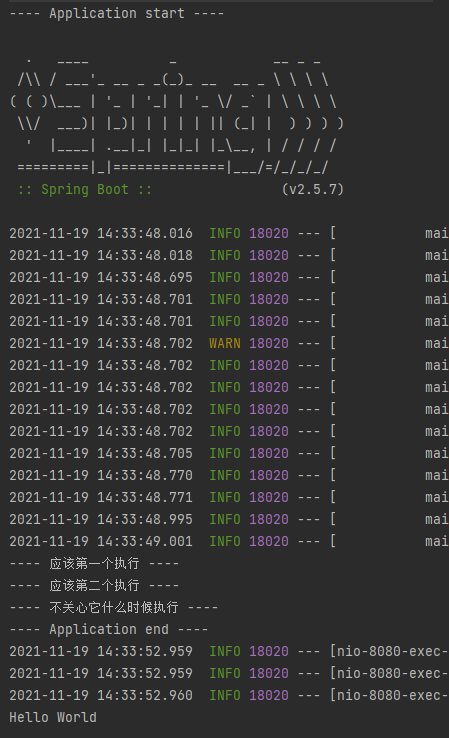
运行结果:
参考