Spring Boot 定时任务
本文将介绍如何通过 SpringBoot 实现定时任务。
一、配置方式
- 在启动类上使用
@EnableScheduling开启定时任务功能 - 新建定时任务类,使用
@Component注解,让 SpringBoot 为类注册 Bean - 在定时任务类中定义定时任务方法,在方法中编写定时任务
- 在定时任务方法上使用
@Scheduled()注解,并填入定时参数
二、定时参数
1. corn 表达式
@Scheduled(cron="*/6 * * * * ?")每 6 秒执行一次
2. 参数
@Scheduled(fixedRate = n):在上次任务开始后 n 毫秒执行下一次任务@Scheduled(fixedDelay = n):在上次任务结束后 n 毫秒执行下一次任务@Scheduled(initialDelay = n1, fixedRate = n2):第一次延迟 n1 后执行,此后按照 fixedRate 的规则定时
三、示例
启动类:
1 | |
定时任务类:
1 | |
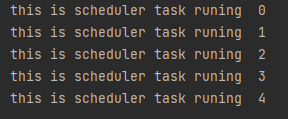
运行效果: