本文将介绍几个 Spring Security 应用示例。
对应代码:
codewld/Spring-Security-Demo: Spring Security 在 Spring Boot 中的集成示例
一、简单示例
Simple-Example
1. 导入依赖 在 pom.xml 中,添加依赖信息如下:
1 2 3 4 5 6 7 8 9 10 11 12 13 14 <dependency > <groupId > org.springframework.boot</groupId > <artifactId > spring-boot-starter-web</artifactId > </dependency > <dependency > <groupId > org.springframework.boot</groupId > <artifactId > spring-boot-starter-thymeleaf</artifactId > </dependency > <dependency > <groupId > org.springframework.boot</groupId > <artifactId > spring-boot-starter-security</artifactId > </dependency >
2. HTML 模板文件
本示例使用 thymeleaf 作为 HTML 模板引擎
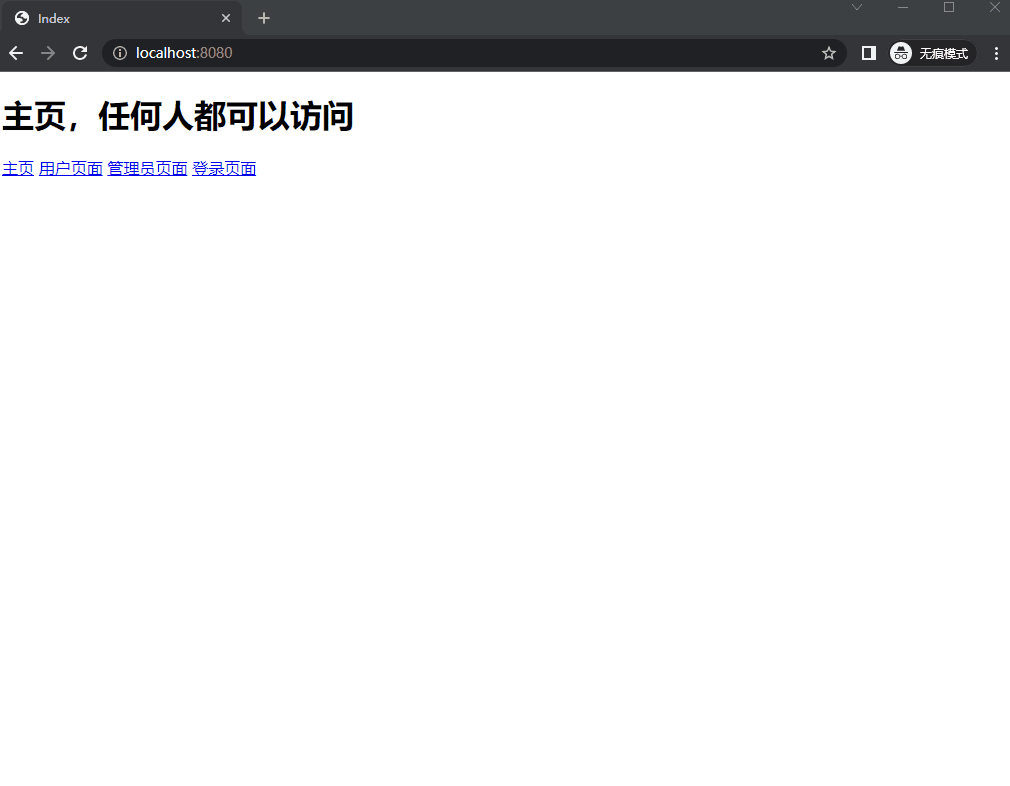
(1) index.html 1 2 3 4 5 6 7 8 9 10 11 12 13 14 15 <!DOCTYPE html > <html xmlns:th ="http://www.thymeleaf.org" > <html lang ="en" > <head > <meta charset ="UTF-8" > <title > Index</title > </head > <body > <h1 > 主页,任何人都可以访问</h1 > <a href ="/index" > 主页</a > <a href ="/user" > 用户页面</a > <a href ="/admin" > 管理员页面</a > <a href ="/login" > 登录页面</a > </body > </html >
(2) login.html 1 2 3 4 5 6 7 8 9 10 11 12 13 14 15 16 17 18 19 20 21 22 23 24 25 26 27 28 29 30 31 32 33 <!DOCTYPE html > <html xmlns:th ="http://www.thymeleaf.org" > <head > <title > index</title > <meta http-equiv ="Content-Type" content ="text/html; charset=UTF-8" /> </head > <body > <h1 > 登陆页面</h1 > <div style ="text-align: center;margin:0 auto;width: 1000px; " > <form th:action ="@{/login}" method ="post" > <div > <input type ="text" name ="username" /> </div > <div > <input type ="password" name ="password" /> </div > <div th:if ="${param.error}" > <p style ="text-align: center; color: red" class ="text-danger" > 登录失败,账号或密码错误!</p > </div > <div th:if ="${result}" > <p style ="text-align: center" class ="text-success" th:text ="${result}" > </p > </div > <div > <input type ="submit" value ="登陆" /> </div > </form > <a href ="/index" > 主页</a > <a href ="/user" > 用户页面</a > <a href ="/admin" > 管理员页面</a > <a href ="/login" > 登录页面</a > </div > </body > </html >
(3) user/user.html 1 2 3 4 5 6 7 8 9 10 11 12 13 14 15 16 17 18 19 <!DOCTYPE html > <html xmlns:th ="http://www.thymeleaf.org" > <head > <meta charset ="UTF-8" > <title > User</title > </head > <body > <h1 > 用户页面,需要USER权限</h1 > <p > 已经成功登陆,你的用户名是:</p > <p th:text ="${username}" > </p > <form th:action ="@{/logout}" method ="post" > <button class ="btn btn-danger" style ="margin-top: 20px" > 退出登录</button > </form > <a href ="/index" > 主页</a > <a href ="/user" > 用户页面</a > <a href ="/admin" > 管理员页面</a > <a href ="/login" > 登录页面</a > </body > </html >
(4) admin/admin.html 1 2 3 4 5 6 7 8 9 10 11 12 13 14 15 16 17 18 19 <!DOCTYPE html > <html xmlns:th ="http://www.thymeleaf.org" > <head > <meta charset ="UTF-8" > <title > Admin</title > </head > <body > <h1 > 管理员页面,需要ADMIN权限</h1 > <p > 已经成功登陆,你的用户名是:</p > <p th:text ="${username}" > wxb</p > <form th:action ="@{/logout}" method ="post" > <button class ="btn btn-danger" style ="margin-top: 20px" > 退出登录</button > </form > <a href ="/index" > 主页</a > <a href ="/user" > 用户页面</a > <a href ="/admin" > 管理员页面</a > <a href ="/login" > 登录页面</a > </body > </html >
(5) error/403.html 1 2 3 4 5 6 7 8 9 10 11 12 13 14 <!DOCTYPE html > <html lang ="en" > <head > <meta charset ="UTF-8" > <title > 403</title > </head > <body > <h1 style ="color: red" > 403错误,权限不足,请使用合适用户登录</h1 > <a href ="/index" > 主页</a > <a href ="/user" > 用户页面</a > <a href ="/admin" > 管理员页面</a > <a href ="/login" > 登录页面</a > </body > </html >
3. Controller (1) HomeController 1 2 3 4 5 6 7 8 9 10 11 12 @Controller public class HomeController @RequestMapping({"/", "/index"}) public String index () return "index" ;@RequestMapping("/login") public String login () return "login" ;
(2) UserController 1 2 3 4 5 6 7 8 9 10 11 12 13 14 15 @Controller public class UserController @RequestMapping("/user") public String user (@AuthenticationPrincipal UserDetails user, Model model) "username" , user.getUsername());return "user/user" ;@RequestMapping("/admin") public String admin (@AuthenticationPrincipal UserDetails user, Model model) "username" , user.getUsername());return "admin/admin" ;
4. 配置类 新建 Spring Security 配置类,如下:
1 2 3 4 5 6 7 8 9 10 11 12 13 14 15 16 17 18 19 20 21 22 23 24 25 26 27 28 29 30 @EnableWebSecurity public class SecurityConfig extends WebSecurityConfigurerAdapter @Override protected void configure (AuthenticationManagerBuilder auth) throws Exception new BCryptPasswordEncoder())"user" ).password(new BCryptPasswordEncoder().encode("pwd" )).roles("USER" );new BCryptPasswordEncoder())"admin" ).password(new BCryptPasswordEncoder().encode("pwd" )).roles("USER" , "ADMIN" );@Override protected void configure (HttpSecurity http) throws Exception "/" , "/index" , "/error" ).permitAll()"/user/**" ).hasRole("USER" )"/admin/**" ).hasRole("ADMIN" )"/login" ).defaultSuccessUrl("/user" )"/logout" ).logoutSuccessUrl("/login" );
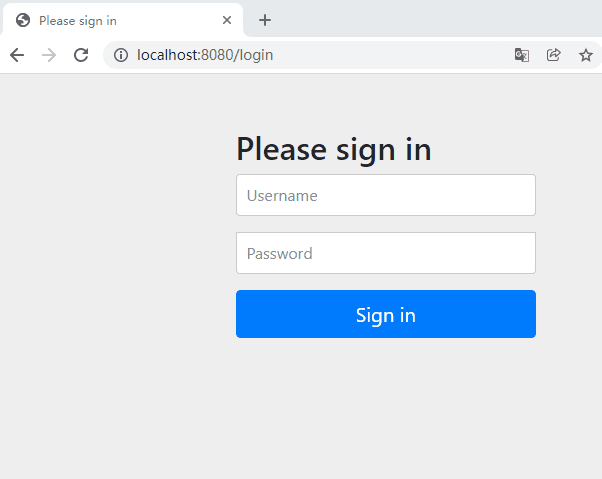
5. 运行效果
二、身份验证 - 后门
BackDoor
1. 后门原理 在 ProviderManager 验证管理器进行验证时,只要有任何一个 AuthenticationProvider 验证类通过了校验,便代表验证成功。
因此只需要添加自定义的 AuthenticationProvider 验证类,并在验证类中通过 Java 编写逻辑,放行特定的登录请求,赋予权限返回即可。
2. 导入依赖 同上
3. 模板文件 同上
4. Controller (1) HomeController 同上
(2) UserController 修改为通过 SecurityContextHolder.getContext().getAuthentication().getName() 获取用户名。
5. 配置类 (1) 增加后门验证类 新建类,填写代码如下:
1 2 3 4 5 6 7 8 9 10 11 12 13 14 15 16 17 18 19 20 21 22 23 24 @Component public class BackdoorAuthenticationProvider implements AuthenticationProvider @Override public Authentication authenticate (Authentication authentication) if ("root" .equals(name)) {new ArrayList<>();new SimpleGrantedAuthority("ROLE_ADMIN" ));new SimpleGrantedAuthority("ROLE_USER" ));return new UsernamePasswordAuthenticationToken("root" , password, authorityCollection);else {return null ;@Override public boolean supports (Class<?> authentication) return authentication.equals(
(2) 配置后门验证类 在 Security 配置类中添加自定义验证类,修改如下:
1 2 3 4 5 6 7 8 9 10 11 12 13 14 15 16 17 18 19 20 21 22 23 24 25 26 27 28 29 30 31 32 33 34 35 36 37 38 @EnableWebSecurity public class SecurityConfig extends WebSecurityConfigurerAdapter @Autowired @Override protected void configure (AuthenticationManagerBuilder auth) throws Exception new BCryptPasswordEncoder())"user" ).password(new BCryptPasswordEncoder().encode("pwd" )).roles("USER" );new BCryptPasswordEncoder())"admin" ).password(new BCryptPasswordEncoder().encode("pwd" )).roles("USER" , "ADMIN" );@Override protected void configure (HttpSecurity http) throws Exception "/" , "/index" , "/error" ).permitAll()"/user/**" ).hasRole("USER" )"/admin/**" ).hasRole("ADMIN" )"/login" ).defaultSuccessUrl("/user" )"/logout" ).logoutSuccessUrl("/login" );
6. 运行效果
三、身份验证 - 数据库
Authentication-DB
1. 数据库 SQL 文件如下:
1 2 3 4 5 6 7 8 9 10 11 12 13 DROP TABLE IF EXISTS `user `;CREATE TABLE `user ` (bigint (20 ) NOT NULL AUTO_INCREMENT,varchar (255 ) CHARACTER SET utf8mb4 COLLATE utf8mb4_bin DEFAULT NULL COMMENT '账号' ,varchar (255 ) CHARACTER SET utf8mb4 COLLATE utf8mb4_bin DEFAULT NULL COMMENT '密码' ,varchar (255 ) CHARACTER SET utf8mb4 COLLATE utf8mb4_bin DEFAULT NULL COMMENT '角色' ,PRIMARY KEY (`id`)= InnoDB AUTO_INCREMENT= 3 DEFAULT CHARSET= utf8;BEGIN ;INSERT INTO `user ` VALUES ('1' , 'zhang' ,'$2a$10$9SIFu8l8asZUKxtwqrJM5ujhWarz/PMnTX44wXNsBHfpJMakWw3M6' , 'ROLE_USER' );INSERT INTO `user ` VALUES ('2' , 'xm123' ,'$2a$10$9SIFu8l8asZUKxtwqrJM5ujhWarz/PMnTX44wXNsBHfpJMakWw3M6' , 'ROLE_USER,ROLE_ADMIN' );COMMIT ;
2. 导入依赖 在 pom.xml 中,添加依赖信息如下:
1 2 3 4 5 6 7 8 9 10 11 12 13 14 15 16 17 18 19 20 21 22 23 24 25 <dependency > <groupId > org.springframework.boot</groupId > <artifactId > spring-boot-starter-web</artifactId > </dependency > <dependency > <groupId > org.springframework.boot</groupId > <artifactId > spring-boot-starter-thymeleaf</artifactId > </dependency > <dependency > <groupId > org.springframework.boot</groupId > <artifactId > spring-boot-starter-security</artifactId > </dependency > <dependency > <groupId > mysql</groupId > <artifactId > mysql-connector-java</artifactId > <scope > runtime</scope > </dependency > <dependency > <groupId > org.springframework.boot</groupId > <artifactId > spring-boot-starter-data-jpa</artifactId > </dependency >
3. 模板文件 同上
4. Bean 新建 User 类,具体代码如下:
User 类应该实现 UserDetails 接口,使得实体类中的信息可以被 Security 使用
1 2 3 4 5 6 7 8 9 10 11 12 13 14 15 16 17 18 19 20 21 22 23 24 25 26 27 28 29 30 31 32 33 34 35 36 37 38 39 40 41 42 43 44 45 46 47 48 49 50 51 52 53 54 55 56 57 58 59 @Entity public class User implements UserDetails @Id @GeneratedValue private Long id;@Column(unique = true) private String username;private String password;private String roles;@Override public Collection<? extends GrantedAuthority> getAuthorities() {"," );new ArrayList<>();for (String role : authorities) {new SimpleGrantedAuthority(role));return simpleGrantedAuthorities;@Override public String getPassword () return password;@Override public String getUsername () return username;@Override public boolean isAccountNonExpired () return true ;@Override public boolean isAccountNonLocked () return true ;@Override public boolean isCredentialsNonExpired () return true ;@Override public boolean isEnabled () return true ;
5. Dao 1 2 3 4 5 6 @Repository public interface UserDao extends JpaRepository <User , Long > User getByUsername (String username) ;
6. Controller 同上
7. DetailsService 新建类,实现 UserDetailsService 接口,使得 Spring Security 能够通过它根据用户名读取正确的用户信息。
1 2 3 4 5 6 7 8 9 10 11 12 13 14 15 16 @Service public class MyUserDetailsService implements UserDetailsService @Autowired @Override public UserDetails loadUserByUsername (String username) throws UsernameNotFoundException if (user == null ) {throw new UsernameNotFoundException("数据库中无此用户!" );return user;
8. 配置类 新建 Spring Security 配置类,如下:
通过 userDetailsService() 方法配置 userDetailsService
通过 passwordEncoder() 方法配置密码加密器
1 2 3 4 5 6 7 8 9 10 11 12 13 14 15 16 17 18 19 20 21 22 23 24 25 26 27 28 29 @EnableWebSecurity public class SecurityConfig extends WebSecurityConfigurerAdapter @Autowired @Override protected void configure (AuthenticationManagerBuilder auth) throws Exception new BCryptPasswordEncoder());@Override protected void configure (HttpSecurity http) throws Exception "/" , "/index" , "/error" ).permitAll()"/user/**" ).hasRole("USER" )"/admin/**" ).hasRole("ADMIN" )"/login" ).defaultSuccessUrl("/user" )"/logout" ).logoutSuccessUrl("/login" );
8. 运行效果
四、访问控制 - 数据库
Authorization-DB
1. 数据库 SQL 文件如下:
1 2 3 4 5 6 7 8 9 10 11 12 DROP TABLE IF EXISTS `resource`;CREATE TABLE `resource` (bigint (20 ) NOT NULL AUTO_INCREMENT,varchar (255 ) DEFAULT NULL COMMENT '资源' ,varchar (255 ) DEFAULT NULL COMMENT '所需角色' ,PRIMARY KEY (`id`)= InnoDB AUTO_INCREMENT= 3 DEFAULT CHARSET= utf8;BEGIN ;INSERT INTO `resource` VALUES ('3' , '/user/**' , 'ROLE_ADMIN,ROLE_USER' );INSERT INTO `resource` VALUES ('4' , '/admin/**' , 'ROLE_ADMIN' );COMMIT ;
2. 导入依赖 同上
3. 模板文件 同上
4. Bean 1 2 3 4 5 6 7 8 9 10 11 12 13 14 15 16 17 18 19 @Entity public class Resource @Id @GeneratedValue private Long id;private String url;private String roles;public String[] getRolesArray(){return roles.split("," );
5. Dao 1 2 3 4 @Repository public interface ResourceDao extends JpaRepository <Resource , Long >
6. Controller 同上
1 2 3 4 5 6 7 8 9 10 11 12 13 14 15 16 17 18 19 20 21 22 23 24 25 26 27 28 29 30 31 32 @Component public class MySecurityMetadataSource implements FilterInvocationSecurityMetadataSource @Autowired new AntPathMatcher();@Override public Collection<ConfigAttribute> getAttributes (Object object) throws IllegalArgumentException for (Resource resource : resourceDao.findAll()) {if (antPathMatcher.match(resource.getUrl(), requestUrl) && resource.getRolesArray().length > 0 ) {return SecurityConfig.createList(resource.getRolesArray());return SecurityConfig.createList("ROLE_NONE" );@Override public Collection<ConfigAttribute> getAllConfigAttributes () return null ;@Override public boolean supports (Class<?> clazz) return FilterInvocation.class.isAssignableFrom(clazz);
8. AccessDecisionManager 1 2 3 4 5 6 7 8 9 10 11 12 13 14 15 16 17 18 19 20 21 22 23 24 25 26 27 28 29 30 31 32 33 34 35 36 @Component public class MyAccessDecisionManager implements AccessDecisionManager @Override public void decide (Authentication authentication, Object object, Collection<ConfigAttribute> configAttributes) throws AccessDeniedException, InsufficientAuthenticationException {for (ConfigAttribute attribute : configAttributes) {if ("ROLE_NONE" .equals(role)) {return ;for (GrantedAuthority authority : authorities) {if (authority.getAuthority().equals(role)) {return ;throw new AccessDeniedException("你没有访问" + object + "的权限!" );@Override public boolean supports (ConfigAttribute attribute) return true ;@Override public boolean supports (Class<?> clazz) return true ;
9. 配置类 1 2 3 4 5 6 7 8 9 10 11 12 13 14 15 16 17 18 19 20 21 22 23 24 25 26 27 28 29 30 31 32 33 34 35 36 37 38 39 40 41 42 @EnableWebSecurity public class SecurityConfig extends WebSecurityConfigurerAdapter @Autowired @Autowired @Override protected void configure (AuthenticationManagerBuilder auth) throws Exception new BCryptPasswordEncoder())"user" ).password(new BCryptPasswordEncoder().encode("pwd" )).roles("USER" );new BCryptPasswordEncoder())"admin" ).password(new BCryptPasswordEncoder().encode("pwd" )).roles("USER" , "ADMIN" );@Override protected void configure (HttpSecurity http) throws Exception "/" , "/index" , "/login" , "/error" ).permitAll()new ObjectPostProcessor<FilterSecurityInterceptor>() {@Override public <O extends FilterSecurityInterceptor> O postProcess (O object) {return object;"/login" ).defaultSuccessUrl("/user" )"/logout" ).logoutSuccessUrl("/login" );
11. 运行效果
五、JSON
JSON
1. 导入依赖 1 2 3 4 5 6 7 8 9 <dependency > <groupId > org.springframework.boot</groupId > <artifactId > spring-boot-starter-web</artifactId > </dependency > <dependency > <groupId > org.springframework.boot</groupId > <artifactId > spring-boot-starter-security</artifactId > </dependency >
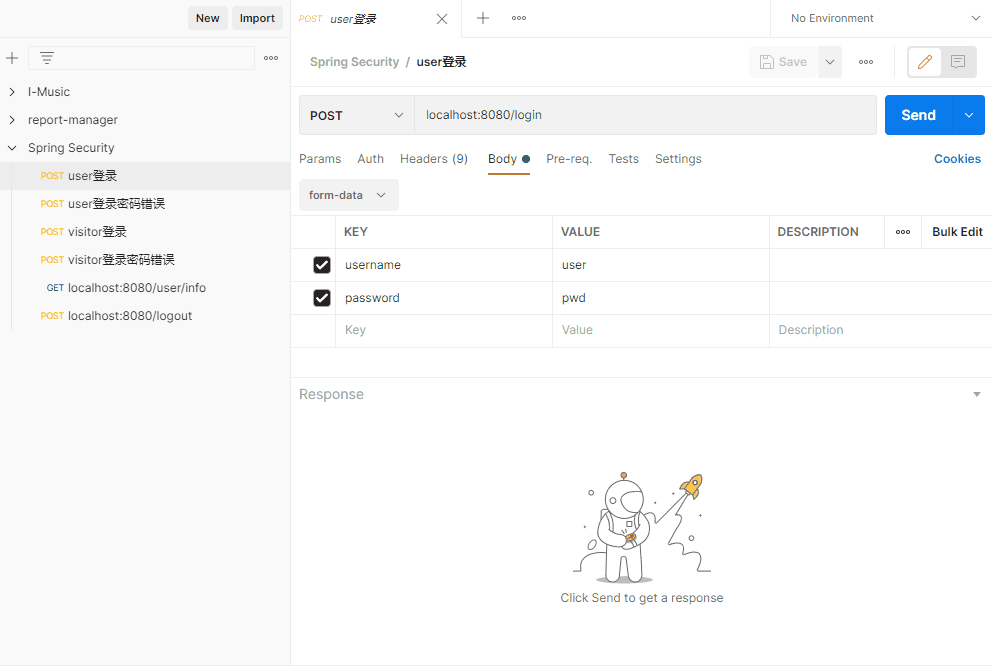
2. Controller 1 2 3 4 5 6 7 8 9 10 @RestController @RequestMapping("/user") public class UserController @GetMapping("/info") public Object getConsumeRecord () return "用户个人信息" ;
3. LoginSuccessHandler 1 2 3 4 5 6 7 8 9 10 @Component public class LoginSuccessHandler implements AuthenticationSuccessHandler @Override public void onAuthenticationSuccess (HttpServletRequest request, HttpServletResponse response, Authentication authentication) throws IOException, ServletException "Success Login" );
4. LoginFailureHandler 1 2 3 4 5 6 7 8 9 10 @Component public class LoginFailureHandler implements AuthenticationFailureHandler @Override public void onAuthenticationFailure (HttpServletRequest request, HttpServletResponse response, AuthenticationException exception) throws IOException, ServletException "Failure Login" );
5. LogoutHandler 1 2 3 4 5 6 7 8 9 10 @Component public class LogoutHandler implements org .springframework .security .web .authentication .logout .LogoutSuccessHandler @Override public void onLogoutSuccess (HttpServletRequest request, HttpServletResponse response, Authentication authentication) throws IOException, ServletException "Success Logout" );
6. AuthenticationEntryPoint 1 2 3 4 5 6 7 8 9 10 @Component public class AuthenticationEntryPoint implements org .springframework .security .web .AuthenticationEntryPoint @Override public void commence (HttpServletRequest request, HttpServletResponse response, AuthenticationException authException) throws IOException, ServletException "Please Login" );
7. AccessDeniedHandler 1 2 3 4 5 6 7 8 9 10 @Component public class AccessDeniedHandler implements org .springframework .security .web .access .AccessDeniedHandler @Override public void handle (HttpServletRequest request, HttpServletResponse response, AccessDeniedException accessDeniedException) throws IOException, ServletException "Access Denied" );
8. 配置类 1 2 3 4 5 6 7 8 9 10 11 12 13 14 15 16 17 18 19 20 21 22 23 24 25 26 27 28 29 30 31 32 33 34 35 36 37 38 39 40 41 42 43 44 45 46 47 48 49 50 51 52 53 @EnableWebSecurity public class SecurityConfig extends WebSecurityConfigurerAdapter @Autowired @Autowired @Autowired @Autowired @Autowired @Override protected void configure (AuthenticationManagerBuilder auth) throws Exception new BCryptPasswordEncoder())"user" ).password(new BCryptPasswordEncoder().encode("pwd" )).roles("USER" );new BCryptPasswordEncoder())"visitor" ).password(new BCryptPasswordEncoder().encode("pwd" )).roles("VISITOR" );@Override protected void configure (HttpSecurity http) throws Exception "/user/**" ).hasRole("USER" )"/login" )"/logout" )
9. 测试
六、验证码
VerifyCode
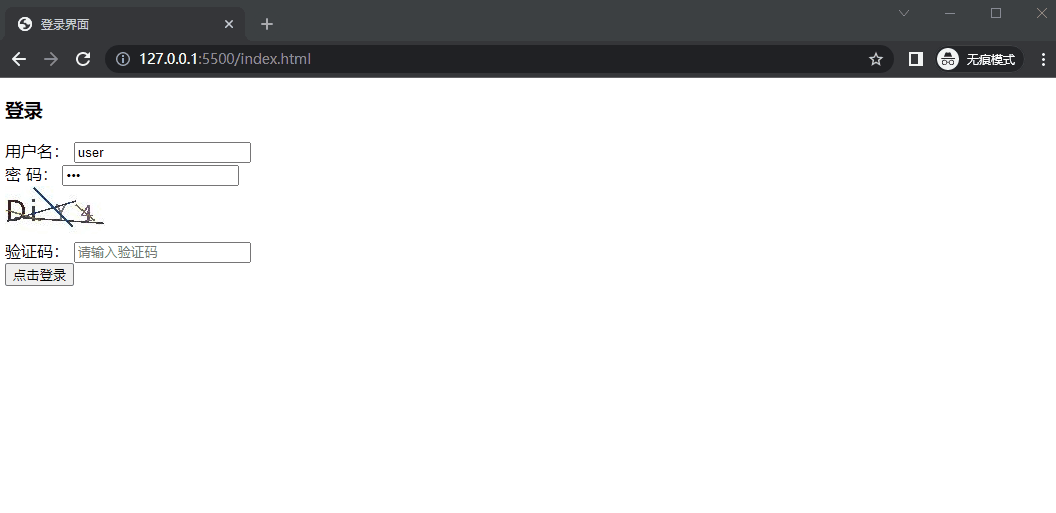
1. 说明 本例将介绍如何在前后端分离的情况下,在登录中添加验证码功能。
2. 导入依赖 1 2 3 4 5 6 7 8 9 <dependency > <groupId > org.springframework.boot</groupId > <artifactId > spring-boot-starter-web</artifactId > </dependency > <dependency > <groupId > org.springframework.boot</groupId > <artifactId > spring-boot-starter-security</artifactId > </dependency >
3. 网页文件 1 2 3 4 5 6 7 8 9 10 11 12 13 14 15 16 17 18 19 20 21 22 23 24 25 26 27 28 29 30 31 32 33 34 <!DOCTYPE html > <html lang ="zh-CN" > <head > <meta charset ="UTF-8" > <meta name ="viewport" content ="width=device-width, initial-scale=1.0" > <title > 登录界面</title > </head > <body > <div class ="login" > <h3 > 登录</h3 > <form action ="http://localhost:8080/login" method ="POST" > <div class ="form_item" > <label for ="" > 用户名:</label > <input type ="text" name ="username" value ="user" autocomplete ="off" placeholder ="请输入用户名" > </div > <div class ="form_item" > <label for ="" > 密 码:</label > <input type ="password" name ="password" value ="pwd" autocomplete ="off" placeholder ="请输入密码" > </div > <img src ="http://localhost:8080/verify-code" alt ="" > <div class ="form_item" > <label for ="" > 验证码:</label > <input type ="text" name ="verify-code" placeholder ="请输入验证码" > </div > <div class ="form_item" > <input type ="submit" value ="点击登录" > </div > </form > </div > </body > </html >
4. 验证码生产及分发 (1) 验证码生产 1 2 3 4 5 6 7 8 9 10 11 12 13 14 15 16 17 18 19 20 21 22 23 24 25 26 27 28 29 30 31 32 33 34 35 36 37 38 39 40 41 42 43 44 45 46 47 48 49 50 51 52 53 54 55 56 57 58 59 60 61 62 63 64 65 66 67 68 69 70 71 72 73 74 75 76 77 78 79 80 81 82 83 84 85 86 87 88 89 90 91 92 93 94 95 96 97 98 99 100 public class VerifyCode private int width = 100 ;private int height = 50 ;private String[] fontNames = { "宋体" , "楷体" , "隶书" , "微软雅黑" };private Color bgColor = new Color(255 , 255 , 255 );private Random random = new Random();private String codes = "0123456789abcdefghijklmnopqrstuvwxyzABCDEFGHIJKLMNOPQRSTUVWXYZ" ;private String text;private Color randomColor () int red = random.nextInt(150 );int green = random.nextInt(150 );int blue = random.nextInt(150 );return new Color(red, green, blue);private Font randomFont () int style = random.nextInt(4 );int size = random.nextInt(5 ) + 24 ;return new Font(name, style, size);private char randomChar () return codes.charAt(random.nextInt(codes.length()));private BufferedImage createImage () new BufferedImage(width, height, BufferedImage.TYPE_INT_RGB);0 , 0 , width, height);return image;public BufferedImage getImage () new StringBuffer();for (int i = 0 ; i < 4 ; i++) {"" ;float x = i * width * 1.0f / 4 ;15 );this .text = sb.toString();return image;private void drawLine (BufferedImage image) int num = 5 ;for (int i = 0 ; i < num; i++) {int x1 = random.nextInt(width);int y1 = random.nextInt(height);int x2 = random.nextInt(width);int y2 = random.nextInt(height);new BasicStroke(1.5f ));public String getText () return text;public static void output (BufferedImage image, OutputStream out) throws IOException "JPEG" , out);
(2) 验证码分发 1 2 3 4 5 6 7 8 9 10 11 12 @RestController public class LoginController @GetMapping("/verify-code") public void code (HttpServletRequest req, HttpServletResponse resp) throws IOException new VerifyCode();"verify-code" , text);
5. 配置 cookie 策略 在新版本的 Chrome 中新增了 sameSite 属性,它用于防止 CSRF 攻击和用户追踪。
具体请看:
Cookie 的 SameSite 属性 - 阮一峰的网络日志
又由于此例是前后端分离,为了使 “验证码分发” 中的 setCookie 生效,需要修改 sameSite 策略。
在 application.properties 中修改如下:
1 2 server.servlet.session.cookie.same-site =none server.servlet.session.cookie.secure =true
6. LoginSuccessHandler 1 2 3 4 5 6 7 8 9 10 @Component public class LoginSuccessHandler implements AuthenticationSuccessHandler @Override public void onAuthenticationSuccess (HttpServletRequest request, HttpServletResponse response, Authentication authentication) throws IOException, ServletException "Success Login" );
7. LoginFailureHandler 1 2 3 4 5 6 7 8 9 10 11 @Component public class LoginFailureHandler implements AuthenticationFailureHandler @Override public void onAuthenticationFailure (HttpServletRequest request, HttpServletResponse response, AuthenticationException exception) throws IOException, ServletException "Failure Login" );
8. 验证码验证 1 2 3 4 5 6 7 8 9 10 11 12 13 14 15 16 17 18 19 20 21 22 23 24 25 26 27 28 29 @Component public class VerifyCodeFilter extends GenericFilterBean @Autowired private AuthenticationFailureHandler authenticationFailureHandler;@Override public void doFilter (ServletRequest request, ServletResponse response, FilterChain chain) throws IOException, ServletException if ("POST" .equalsIgnoreCase(req.getMethod()) && "/login" .equals(req.getServletPath())) {try {"verify-code" );"verify-code" );if (!StringUtils.hasLength(code))throw new AuthenticationServiceException("Verification code cannot be empty!" );if (!trueCode.equalsIgnoreCase(code)) {throw new AuthenticationServiceException("Verification code mismatch!" );catch (AuthenticationException e) {return ;
9. 配置类 1 2 3 4 5 6 7 8 9 10 11 12 13 14 15 16 17 18 19 20 21 22 23 24 25 26 27 28 29 30 31 32 33 34 35 36 37 38 @EnableWebSecurity public class SecurityConfig extends WebSecurityConfigurerAdapter @Autowired @Autowired @Autowired @Override protected void configure (AuthenticationManagerBuilder auth) throws Exception new BCryptPasswordEncoder())"user" ).password(new BCryptPasswordEncoder().encode("pwd" )).roles("USER" );@Override protected void configure (HttpSecurity http) throws Exception "/login" )@Override public void configure (WebSecurity web) throws Exception "/verify-code" );
10. 示例
七、JWT
JWT
1. 导入依赖 在 pom.xml 中增加信息如下:
1 2 3 4 5 6 7 8 9 10 11 12 13 14 15 <dependency > <groupId > org.springframework.boot</groupId > <artifactId > spring-boot-starter-web</artifactId > </dependency > <dependency > <groupId > org.springframework.boot</groupId > <artifactId > spring-boot-starter-security</artifactId > </dependency > <dependency > <groupId > com.auth0</groupId > <artifactId > java-jwt</artifactId > <version > 3.18.2</version > </dependency >
2. LoginSuccessHandler 当登陆成功时,生成 JWT,并通过 response 返回。
1 2 3 4 5 6 7 8 9 10 11 12 13 14 15 16 17 18 19 20 21 @Component public class LoginSuccessHandler implements AuthenticationSuccessHandler @Override public void onAuthenticationSuccess (HttpServletRequest request, HttpServletResponse response, Authentication authentication) throws IOException, ServletException "application/json;charset=utf-8" );new StringBuilder();for (GrantedAuthority authority : authentication.getAuthorities()) {"," );"authorities" , authorities.toString())new Date())new Date(System.currentTimeMillis() + 60 * 60 * 1000 ))"111111" ));
3. LoginFailureHandler 当登录失败时,返回登录失败的提示信息。
1 2 3 4 5 6 7 8 @Component public class LoginFailureHandler implements AuthenticationFailureHandler @Override public void onAuthenticationFailure (HttpServletRequest request, HttpServletResponse response, AuthenticationException exception) throws IOException, ServletException "Failure Login" );
4. JWT 验证类
对 JWT 做验证
如果验证成功,则从 JWT 中获取信息,并封装成 UsernamePasswordAuthenticationToken,设为 Authentication(当前用户)
1 2 3 4 5 6 7 8 9 10 11 12 13 14 15 16 17 18 19 20 21 22 public class JWTVerifyFilter extends GenericFilterBean @Override public void doFilter (ServletRequest request, ServletResponse response, FilterChain filterChain) throws IOException, ServletException "authorization" );if (!"/login" .equals(req.getServletPath()) && jwtToken != null ) {try {"111111" )).build().verify(jwtToken);new UsernamePasswordAuthenticationToken(0 ),null ,"authorities" ).asString())catch (JWTVerificationException e) {return ;
5. 配置类 1 2 3 4 5 6 7 8 9 10 11 12 13 14 15 16 17 18 19 20 21 22 23 24 25 26 27 28 29 30 31 32 33 34 35 36 37 @EnableWebSecurity public class SecurityConfig extends WebSecurityConfigurerAdapter @Autowired @Autowired @Override protected void configure (AuthenticationManagerBuilder auth) throws Exception new BCryptPasswordEncoder())"user" ).password(new BCryptPasswordEncoder().encode("pwd" )).roles("USER" );@Override protected void configure (HttpSecurity http) throws Exception "/*" ).hasRole("USER" )"/login" )new JWTVerifyFilter(), UsernamePasswordAuthenticationFilter.class)
6. 示例
八、自定义登录接口
CustomLoginController
1. 说明 在 Spring Security 中,”登录” 不仅可以通过改造 Security 自带的 formlogin、改造 Security 的过滤器实现,也有 “自由度” 更好的实现方式:自定义登录接口。
2. 实现核心 Spring Security 会在登录成功后将 Authentication 放入安全上下文中,并将安全上下文中是否有 Authentication 作为是否登录的依据。
因此,我们可以自行处理登录验证的逻辑,并在登录成功后生成 Authentication 对象并将其放置到安全上下文中,从而实现更 “自由” 的登录。
3. 导入依赖 略。
4. 测试接口 简单的 Hello World 接口,略。
5. 配置类 配置类需要配置以放行登录接口。
1 2 3 4 5 6 7 8 9 10 11 12 13 14 15 16 17 18 @EnableWebSecurity public class SecurityConfig extends WebSecurityConfigurerAdapter @Override protected void configure (AuthenticationManagerBuilder auth) throws Exception new BCryptPasswordEncoder())"user" ).password(new BCryptPasswordEncoder().encode("pwd" )).roles("USER" );@Override protected void configure (HttpSecurity http) throws Exception "/customLogin" ).permitAll()"/*" ).authenticated();
6. 自定义登录接口 1 2 3 4 5 6 7 8 9 10 11 @RestController public class CustomLoginController @GetMapping("/customLogin") public String login () new UsernamePasswordAuthenticationToken("test" , null , null );return "从自定义登录接口登陆成功" ;
7. 示例
参考