Spring Boot Swagger
本文将介绍如何在 SpringBoot 中集成 Swagger,从而方便地生成接口文档。
一、维护接口文档的难题
1. 接口文档
接口文档负责对接口进行描述,包括接口的作用、参数、返回值等。
在前后端分离的开发模式中,前端与后端将 “面向接口编程”。
此时,接口文档变得十分重要,维护接口文档也成为了一件必不可少的工作。
2. 难题
倘若接口文档只是编写一次还好,但在实际的开发中,接口总是在不断变化,接口文档也必须做相应的修改。
此时,维护接口文档就变成了一件无聊、头大、易错的事情。
二、Swagger
1. Swagger 和 OpenAPI
Swagger 曾是一款用于指导 RESTful 接口的规范, Swagger UI、Swagger Editor 和 Swagger Codegen 等开源工具在 Swagger 规范的基础上衍生。
2015 年,Swagger 被收购后变成一套 API 开发工具,曾经的 Swagger 规范被捐献给 Linux 基金会,并命名为 OpenAPI。
简单来说:
曾经有一个规范叫 Swagger;
现在规范命名为 OpenAPI,而 Swagger 变成一套 API 开发工具。
2. Swagger 工具
(1) 开源部分
Swagger-Editor 用于编辑接口描述文件
Swagger-UI 负责生成接口文档的展示界面
展示接口
Swagger-Codegen 负责生成可调用接口的客户端
测试接口
(2) 非开源部分
- Swagger Hub:云服务,相当于Editor + Codegen + UI
- Swagger Inspector:手动测试API的工具
- SoapUI Pro:功能测试和安全测试的自动化工具
- LoadUI Pro:压力测试和性能测试的自动化工具
3. OpenAPI 2.0
OpenAPI Specification - Version 2.0 | Swagger
4. OpenAPI 3.0
OpenAPI Specification - Version 3.0.3 | Swagger
三、Springfox
1. Swagger 的小问题
虽然 Swagger 衍生出来的一系列工具已经很方便了。
只需要通过 Swagger-Editor 编辑描述文件后,Swagger-UI 就能生成接口文档以便展示接口,Swagger-Codegen 就能够生成客户端以便测试接口
但即便如此,编写接口描述文件也是一个不小的负担,尤其在大量改动、持续迭代开发的情况下。
2. Springfox
Spring 顺势建立了 Swagger 项目,并改名为现在的 Springfox。
Springfox 是一个通过扫描代码提取代码中的信息,生成接口文档的工具。
它有以下 3 个重要的功能:
- 将接口展示在页面中
- 当接口更新时,实时更新接口文档
- 可以在页面中直接进行接口调用,方便功能测试
四、SpringBoot 集成 Springfox2
1. 环境说明
经测试,spring-boot-starter-parent 版本在 2.5.7 及以下才能与 Springfox2 集合并顺利启动。
2. 引入依赖
在 pom.xml 中,添加信息如下:
1 | |
3. 编写接口
编写测试接口如下:
1 | |
4. 开启
新建 Swagger 配置类,如下:
1 | |
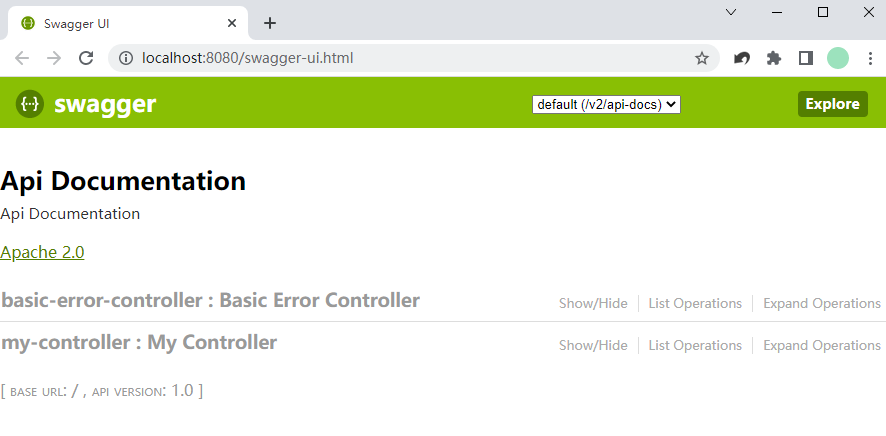
5. 查看接口文档
启动项目,查看 http://localhost:端口/swagger-ui.html,即可看到接口文档页面。
6. 查看、测试接口
五、SpringBoot 集成 Springfox3
1. 引入依赖
在 pom.xml 中,添加信息如下:
1 | |
2. 编写接口
同上
3. 开启
新建 Swagger 配置类,如下:
1 | |
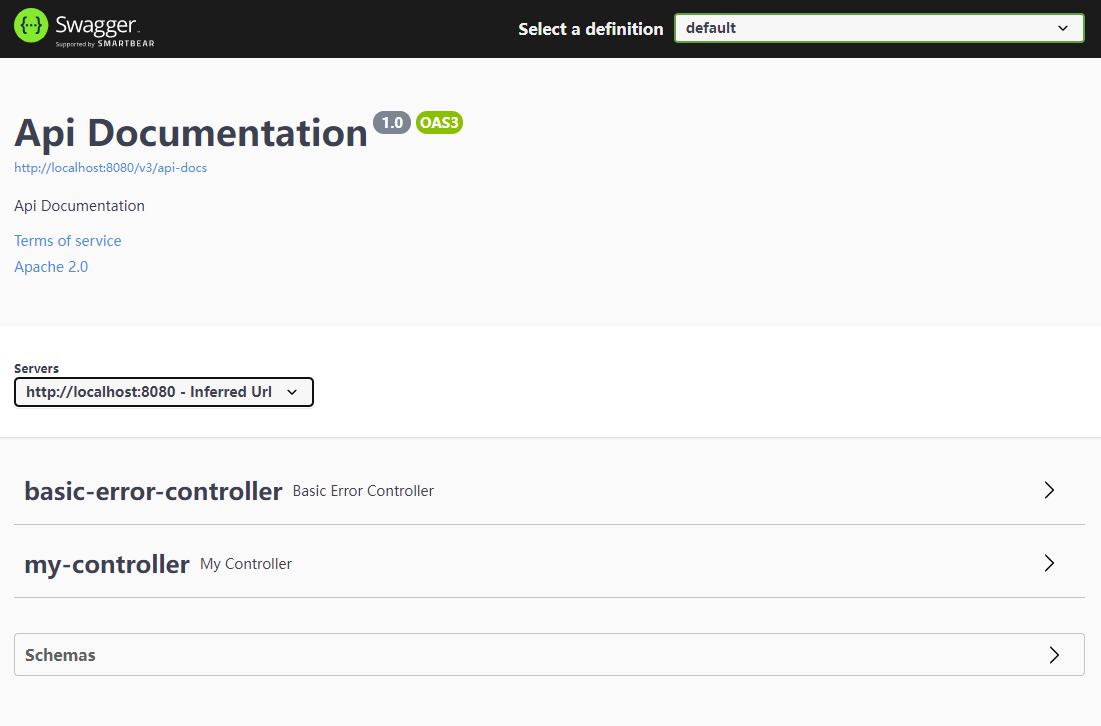
4. 查看接口文档
启动项目,查看 http://localhost:端口/swagger-ui/,即可看到接口文档页面。
5. Springfox2 和 Springfox3 的不同
增加了
springfox-boot-starter依赖,可以更方便地集成 Springfox页面更加好看
访问地址由
http://localhost:端口/swagger-ui.html变为http://localhost:端口/swagger-ui/部分注解有了改变
但兼容旧注解
六、Springfox 配置类
Springfox 的配置类示例如下:
1 | |
其中,
- API 的选择器可以填入:
RequestHandlerSelectors.any():扫描所有 APIRequestHandlerSelectors.basePackage(全限定包名):根据包扫描 APIRequestHandlerSelectors.none():任何 API 都不扫描RequestHandlerSelectors.withClassAnnotation(注解.class):扫描带有指定注解的类中的 APIRequestHandlerSelectors.withMethodAnnotation(注解.class):扫描带有指定注解的 API
- paths 的选择器可以填入:
PathSelectors.any():扫描所有路径PathSelectors.none():任何路径都不扫描PathSelectors.regex(正则表达式):通过正则表达式进行匹配PathSelectors.ant(Ant Pattern):通过 Ant Pattern 进行匹配
七、注解
常用注解如下:
@Api:用于标注 Controller
@ApiOperation:用于标注接口
@ApiImplicitParam:用于标注参数
@ApiImplicitParams:用于标注多个参数
1
2
3
4
5@ApiImplicitParams({
@ApiImplicitParam(···),
@ApiImplicitParam(···),
···
})@ApiModel:用于标注实体类
@ApiModelProperty:用于标注实体类的属性或方法